


I was asked if I could create a guide that describes porting X3 ships to XRebirth / X4.
After much thought, I have now decided to make instructions. I shied away from creating something like this for a long time, because it is quite complex.
Now I have some experience with the porting of ships, which I now dare to do.
I myself use 3dsmax to create the ships for XR. Blender users have to adjust the path to the successful port somewhat. The process should not differ so much from the 3dsmax. However, I cannot make a statement about this because I do not use Blender.
I will try to write the instructions in both German and English. I will use Google's translator for the English part. So please keep in mind that it may not be grammatically correct.
I presuppose here how the arc_ converter is used correctly.
Let's start.
What we need first of all is the decision which ship we want to port. I chose the Maccana Terran ship for this guide. It will be an L ship. I will adjust the size to that of the Balor from XR. Should then go towards the frigate class.
As soon as we have chosen the ship, three things are needed for the port.
The X3 Editor 2
DBOX2
3dsmax
I will not explain here how the X3 Editor 2 and DBOX2 are used. There are instructions here in the forum.
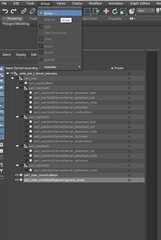
We now start porting at 3dsmax:
First import the Balor into 3dsmax:
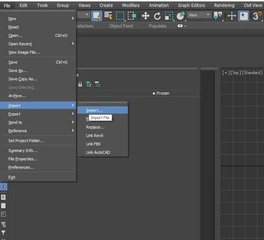
Use the Autodesk Collada import.
In the settings you set units to centimeters.
There is also the Opencollada import. However, it imports the mesh in inches and you have to adjust the size. Means, after the import you have to use the scale function: scale factor 254. With that you have the correct size again.
The advantage of the Opencollada import is that it does not destroy the vertex color, the Autodesk Collada importer does. You have to make the vertex colors again afterwards. But this is not relevant for our port of the ship. So you can use the Autodesk Collada importer.
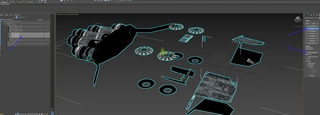
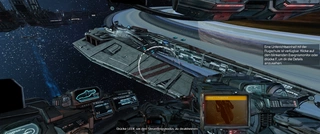
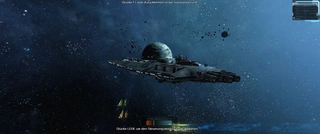
After importing Balor ship we should see the following picture:

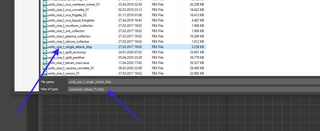
Next we import the X3 ship using the MaxScript DBOX2.

After the import we should have the following picture.
Now we hide all meshes that are not needed and leave and only show the part_mainXcollision mesh and show our X3 ship mesh. We do this so that we can later determine the approximate size of our ship.
We put the X3 ship in the part_mainXlod0 node.
Now we turn the X3 ship in Z by 180 degrees.
And adjust the size to that of the Balor.
I reduced the size by 80%. It roughly fits the Balor. here everyone can decide how big their ship should be.
As soon as we are satisfied with the size we use Reset XForm. The X3 ship is now adapted to the size and orientation of the Balor.
Now we select all groups (nodes) and meshes that we no longer need and delete them.
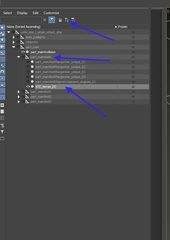
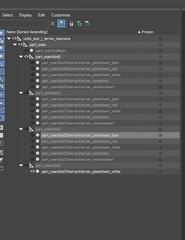
After that, our structure should look like this.
Now we start work and disassemble the ship into its individual materials.
The arc_ converter cannot do anything with multi-material. That's why we have to break down our ship into the individual material IDs.
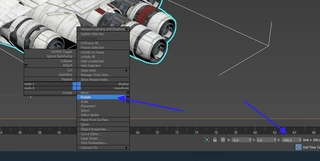
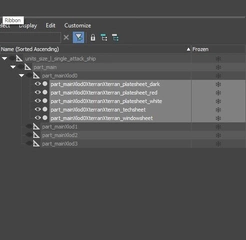
We select the ship and click on Editable Poly / Polygon. Here we select the material IDs in the menu. If we click through, we see that this ship consists of a total of 9 textures.
We will "detach" each one.
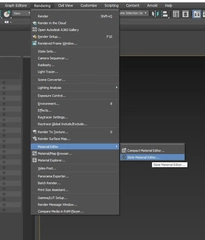
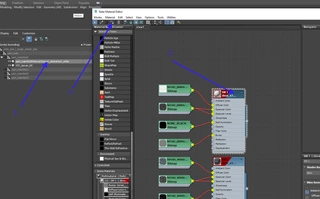
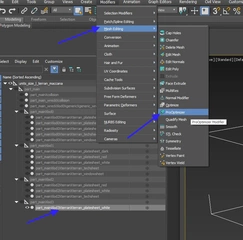
We open the Material Slate Editor and click on the multi-material below. All materials now appear in the editor.
Now we go back to the Material IDs overview, select the 1 here and go to "detach".
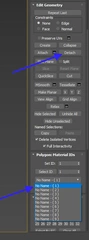
We are asked what our object should be called and whether it should be decoupled as an element or clone. Here we change the name to "1" and leave element and clone empty.
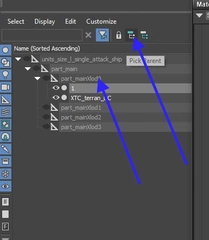
The mesh is now detached from the ship and is located above our groups.
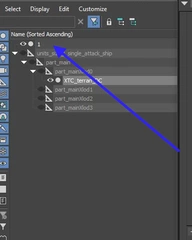
We now have the 1 back in our group part_mainXlod0
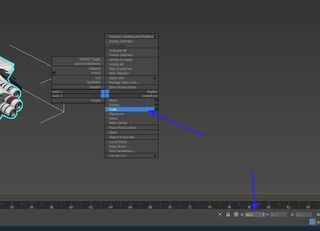
Now we look into the Matrial Slate Editor and click on the SM1 and here on the diffuse texture plate. Here we can see our texture is called. We copy this name and rename our "1" to the following names:
terran_platesheet_white
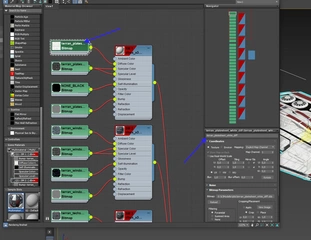
Now we click the SM1 again and assign the texture to our part_mainXlod0XterranXterran_platesheet_white.
This is how we proceed with the remaining 8 material IDs until our complete X3 ship has been divided into 9 different textures. It is best to rename the objects with the number when solving "Detach". So 2-9. This makes it easier to assign the textures.
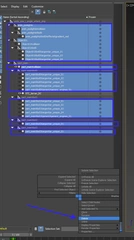
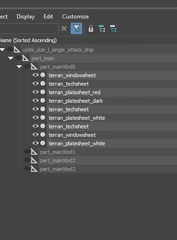
In the end, our structure must look like this:
After detaching, our old X3 object is now empty and can be deleted.
We can see that multiple textures are the same. That is the nice thing about Terran ships. They often have the same textures and these can be combined with one another. If you e.g. If you want to port an argon ship, there can be 20 different textures.
And we have another advantage with the Terran ship. In XRebirth these textures are already included as .dds files. We just have to create the material_library.xml. Unfortunately, it did not make it into the XRebirth material_library.
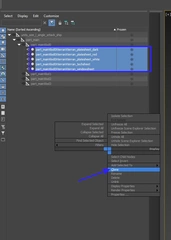
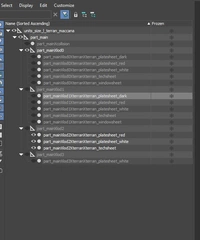
So since we have several of the same textures, we will put these objects together. "collapse"
We do this with all objects that have the same texture. Then our ship should shrink to 5 objects.
Now we are going to give our 5 meshes the correct name.
Out:
terran_platesheet_white
do we:
part_mainXlod0XterranXterran_platesheet_white
This is very important, because only with this naming can our object appear later in the game.
We change all names with the schema and should now have the following structure:
Since we brought some objects together, possibly multimat objects were created again. The game and the converter cannot handle this. We have to change these again to single objects using the Slate Editor. See the point with the Material Slate Editor.
We assign one texture to the object again.
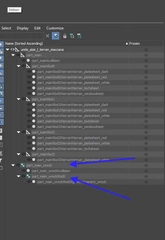
Now we clone our 5 objects as a copy and move the copies to part_mainXlod1
The copies must be renamed. The name part_mainXlod1XterranXterran_platesheet_white should also be in the part_mainXlod1 node. The numbers created when copying to the end of the 3dsmax name are removed.
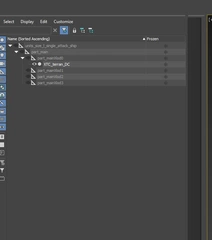
After copying into all lods we should have the following structure:
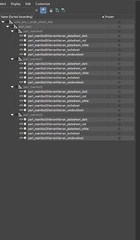
The LODs "Level of Detail" determine the distance from which the objects are displayed. While LOD3 appears very far away from the player and therefore needs to have little details, LOD0 is the most detailed because it is very close to the player.
That is why we will combine the respective objects in the various lods and later also change the level of detail.
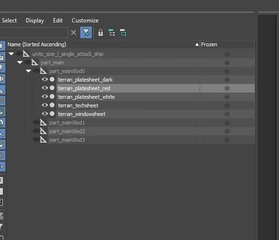
Lod3 appears very far away. So we really only need the basic structure of the ship here. Therefore we only take the part_mainXlod3XterranXterran_platesheet_white as the main object and put it together with the other objects. "collapse"
However, it is very important to pay attention to the order when choosing. So first select part_mainXlod3XterranXterran_platesheet_white. Then select the other objects. Then click "collapse". The objects are merged, with the platesheet_white object acting as the main object and this texture being adopted.
After the objects have been assembled, everything should appear in the platesheet_white texture. If this is not the case, then we have to assign the texture again via the Material Slate Editor. No Multimat object may be created.
Since we have now combined the entire ship as an object in a mesh, we can also use this for the collision mesh.
We simply copy the mesh, move it under the part_main node and rename it to:
part_mainXcollision
After doing that, we should get the following structure:
Now we are devoting ourselves to Lod2 and bringing together the following meshes:
part_mainXlod2XterranXterran_techsheet
part_mainXlod2XterranXterran_windowsheet
part_mainXlod2XterranXterran_platesheet_dark
The techsheet mesh becomes the upper mesh and we select it first, then add the others and click on "collapse". Now the other two meshes should take over the texture of part_mainXlod2XterranXterran_techsheet.
After that is done, we should have the following structure:
So far so good. However, two steps are still missing.
The mesh for the wreck is missing and for a better performance in the game we will reduce some meshes in their complexity. So that the game engine does not later have to calculate unnecessarily for distant objects and thus the performance drops.
We create the wreck from our part_mainXcollision Mesh.
We copy this part_mainXcollision twice and name the copies as follows:
part_main_wreckXcollision
part_main_wreckXlod0XgenericXgeneric_wreck
Before we create the groups for the wreck, we will first optimize the meshes in Lod3, Lod2 and Lod1. We leave Lod0 untouched. We reduce the number of polygons, vertexes etc.
I use the ProOptimizer Modifier. But there are certainly other ways to reduce the number of poly.
Let's start with Lod3.
Since this lod is the farthest away from the player and you can't see any big details, I reduce it here to 60%. Lod2 to 70% and Lod1 to 80%.
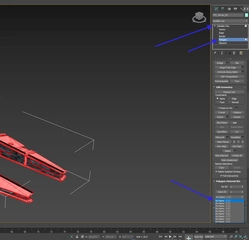
So we choose our Lod3 Mesh and the Modifier ProOptimizer:
Here we select the following points.
Keep textures
Keep UV boundaries
If possible also:
Keep Vertex Colors
Keep VC boundaries
and click on Calculate.
Now the number is calculated and at Vertex% above we enter the 60%
ProOptimizer will now reduce the number to 60%.
We repeat this with all meshes as described above.
At Lod2 all meshes with 70% and Lod1 all with 80%.
You shouldn't set the% number too low. This could result in holes that are too large in the mesh. This process cannot simply be undone. So be a little more careful here. Rather enter a higher number.
After we have reduced all meshes in this way, we also do this with the two part_main_wreckXcollision and
part_main_wreckXlod0XgenericXgeneric_wreck meshes.
Since these are wrecks, it doesn't matter if there are some holes.
We now put these meshes in the main node.
Under units_size_l_terran_maccana
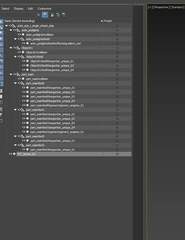
The structure should now look like this:

Now we have to group the wreck.
We do this as follows:
Select part_main_wreckXlod0XgenericXgeneric_wreck and click on Group.
The name of the group must be:
part_main_wreckXlod0
Now we're going to create another group. For this we select the part_main_wreckXlod0 group and the mesh part_main_wreckXcollision and create the group from it:
part_main_wreck
Now our structure should look like this:
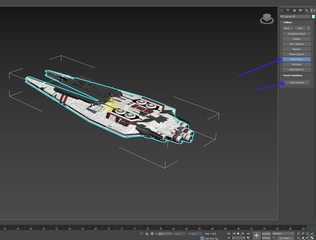
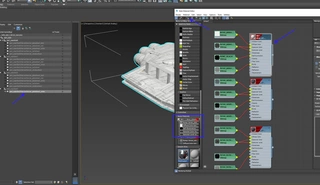
We have created a port of an X3 ship that works for XRebirth and X4.
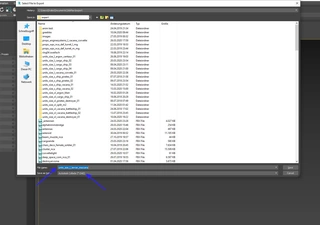
Now we export the ship as .dae from 3dsmax with the name:
units_size_l_terran_maccana
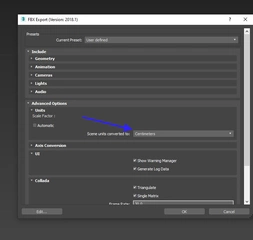
When exporting, make sure that the Autodesk collada exporter is selected
and the units are set as centimeters.
In the second part we want to devote ourselves to creating a functioning mod and bringing the created ship into the game.
Regards,
SirFrancisDrake


")